Converting a first generation minivan to manual transmission
Common parts required-
1) Manual transaxle (520/555/523/568) The 555 or 568 are better choice if running taller tires and the diff has a higher load rating. If you are going to avoid one legged tire fires the 520 or 523 diff should do fine.
2) Shifter cables and shifter that match transaxle being used. For some strange reason minivans have different length cables the Daytona's or Shadow's. Since the difference is about an inch I had no problems running Shadow cables which are reputed as being the shortest. I also used a Shadow shifter which has a bend in it which worked out to be more comfortable shifting.
3) Turbo flywheel, manual flywheel bolts, turbo clutch disc, turbo pressure plate and throwout bearing. Don't be cheap here! A minivan will tip the scales at 3200 lbs empty, throw in a driver, luggage and kids and you can reach 4000+ lbs in a hurry! I used an OEM Turbo III pressure plate with a 10 year old RPS asbestos disc that was sitting on the shelf from my '86 Daytona.
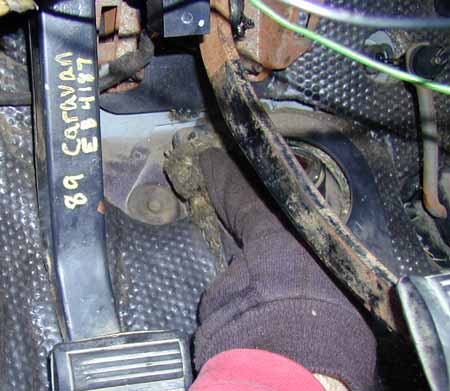
4) Manual transmission mount- Same as any 84-89 manual Daytona/Shadow/GTS.
5) Shifter clips, transaxle cable clips, clutch cable bracket clip, clutch cable end retainer and rubber insert, rubber cable "shock pad" for transaxle clutch cable and reverse lamp plug. Hit the yards and look for the nearest Daytona/Shadow/Lancer/GTS with a 5 speed.
Minivan specific parts-
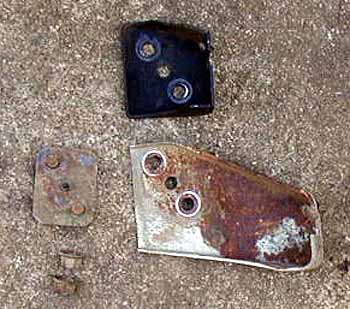
1) Clutch cable, I purchased one from Mopar and the clutch cable bracket which attaches to the drivers shocktower from a junkyard.
(Daytona cable bracket top, minivan unit below)
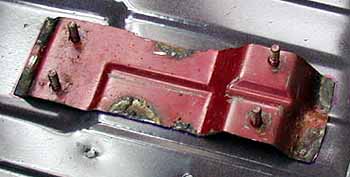
2) Bracket welded to floor for shifter mounting. You could always make one, I went for the factory look. You will have to get one from a junkyard and cut out the piece and grind the welds. The one I obtained was from an 84 van and worked just fine.
3) Manual pedal set with clutch pedal stop. The clutch pedal itself is the same as a Daytona but the plastic insert is different as is the pedal stop. On the Daytona the stop is welded in place, we are in luck as on the mini's its a bolt in.
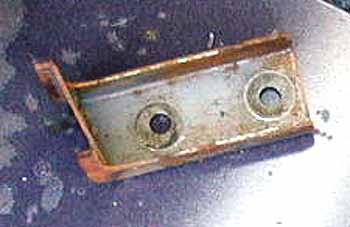
(close up of pedal stop)
Minivan specific parts, optional-
1) Console and console mounting bracket for the top of the shifter.
Below are the steps I undertook to do the conversion which was completed from start to finish in under 12 hours. This time includes doing other work to the van including replacement of a balky cruise control servo, addition of a layer of sound deadener, addition of a missing bracket for added on factory console and repair of a balky clutch arm due to corrosion.
They don't have to be done in this order of course, after reviewing what needs to be done proceed in any order you like.
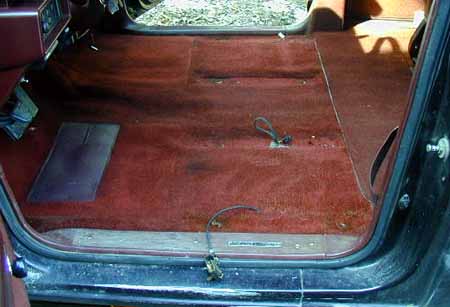
Remove the seats from under the van (4 nuts each side) and remove the scuff plates so you can peel the carpet back.
After peeling the carpet back you will see a perforated "knockout" in the center of the carpet matting, feel free to remove it at this time and take a marker and outline the freshly exposed area on the floorpan.

Eyeballing the target area, note the shifter cable hole with plugged with sealer.

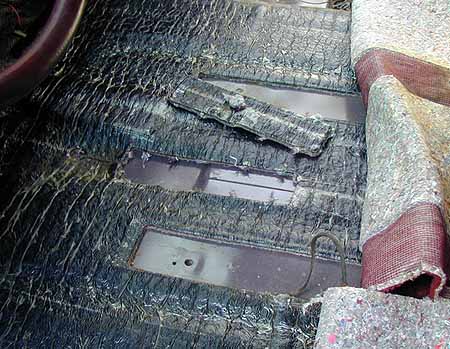
After grinding the excess junkyard floorpan off the bracket, test fitting and grinding away the paint. Note that the bracket contours to the floorpan and really only fits on one way.
After welding, wire-wheeling and painting. Remember to paint the backside of the floorpan too where the paint will be blistered from the heat if welding. You could also opt to bolt in the shifter bracket as well as long as the fasteners don't interfere with the shifter. At this point you can run the shifter and cables if you like and leave the cables hanging loose till you're ready to install the manual transmission. The cables use a rubber two hole grommet found on all pre-90 vehicles that is held in place with two screw-studs and a plate. It's easier to secure the grommet now then when the carpet is in place.
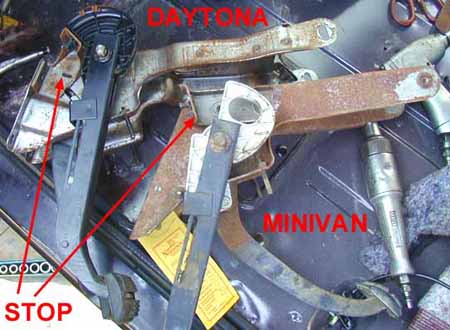
At his point it I decided it was time to install the manual pedals. Start by removing the lower dash area below the column (5 or 6 screws) and then remove the sheet metal brace directly below held in place with 2-3 screws. Unplug the main column wiring at the gray junction block on the left side next to the fuse panel. There will be 3 to 6 items to unplug here depending on your level of van options. Don't worry about remembering how they go back together, all the plugs are unique. Disconnect the wiper module on the right side of the column and for good measure slide it out of it's bracket and set it aside. On the underside of the column you will see a green wire running down from the dash with a clip retainer. This is for the PRND21 indicator on the dash. Place the shifter in low one to remove the tension on the wire, remove the retainer clip and disconnect the wire from the column. At this point remove the five 10 mm nuts holding the column to the dash and gently lower it down. Once the column has been lowered you can now reach and unplug the high beam switch wiring and ignition switch wiring. You last task before pulling the column out is to pop out the retaining clip for the column shift cable and to pop the cable end out of it's socket and wiggle the cable out from the hole. Be careful! There is a lot of wiring in this area and it can be a pain to get the cable free. Once this is done it is a simple matter to wiggle the column out from the rack and place it aside.
At this point unplug the stop lamp switch and set it aside, now you are ready to unbolt the automatic pedal. On the right side of the pedal is a 15 mm nut, remove this while holding the left side with appropriate wrench or locking pliers. Pull the pedal shaft out from the left side, disconnect the clip holding the pedal to the power brake booster and rotate the pedal out. While you are removing things, disconnect the shifter cable on the automatic transaxle and wiggle the cable out of the way. Don't damage the grommet from the auto cable, you will need it later.
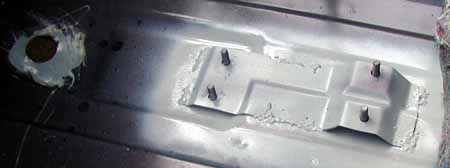
Now is a good time to remove the cutout in the sound deadener for where the cable passes through the firewall, pry out and set aside the rubber plug for the firewall hole and install the clutch pedal stop. On the upper left side of the pedal bracket near the firewall hole there is two 13 mm bolts, remove them and slip the stop in place and reinstall the bolts.
You should have something that looks like this now. Note the arrows showing the clutch cable cutout in the dash sound deadener, pushed out rubber plug location (SAVE THIS) for the clutch cable and installed clutch pedal stop.
Now the tricky part- Slipping the pedals in place! Take the new brake pedal, pre-grease the bushings and place it in the correct location. I attached the pedal to the booster and took a small bolt and popped it in the right side shaft hole in the bracket to hold the pedal in place. As you install the pedal shaft it will push the bolt out of the way. Next take the clutch pedal and slide it on the pedal shaft and wiggle it up to the left side of the bracket. You will have to slide the pedal on the shaft one way and then the other to complete this maneuver while patiently holding the bulkhead wiring out of the way! Care and patience much be taken to avoid damaging the wiring and dislocating the cheesy bushings Chrysler uses on both pedals. You could also choose to remove the horseshoe clip off the shaft and install the shaft first and then the clutch pedal. I have had too many clips go flying and vanish during installations so sometimes it's better to be safe then sorry. Once you get the shaft in place, tighten the 15 mm nut and reinstall the brake lamp switch.
Remember that firewall plug you saved? Use it to plug off the opening where the automatic cable passed through the firewall. Time to head out into the engine bay.... At this time I'd have the van on jackstands with the wheels off, it's going to be required soon.
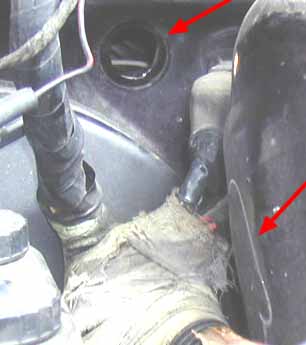
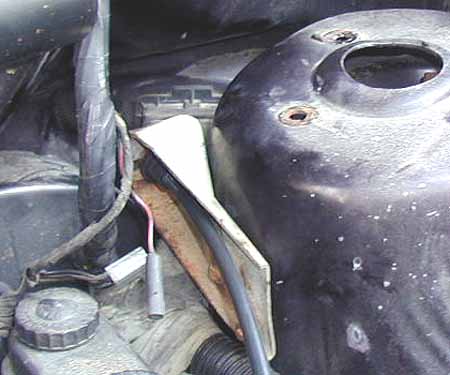
Remove the washer fluid container and set aside. Pry out the knockout plug for the clutch cable bracket indicated in the picture above. Unbolt the 3 nuts on the top of the strut tower holding the strut in place, don't worry it won't go anywhere! Pull back on the strut till you get enough room to slip the mounting plate with studs in behind the spring and install the clutch cable bracket. At this point I installed the clutch cable- Since the one from Mopar doesn't come with a grommet I carefully slid the one off the automatic cable and installed it on the new clutch cable.
You should now be looking like this- Now reinstall the 3 strut nuts on the top of the shocktower and the washer bottle.
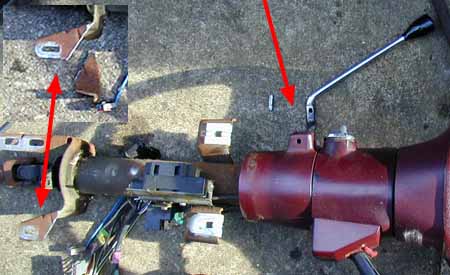
Once the clutch cable was installed I moved onto the next part of the program which was to modify the steering column and reinstall. On the left side you can see where I sliced off the shifter cable mounting bracket (inset photo) and on the right I drove out the shifter retaining pin with a punch. Reinstall column, wiring and lower dash.

While everything was apart I took the opportunity to lay down an extra layer of sound deadener from Summit Racing and install a missing bracket for the factory console I added a year ago. Since the van is used for long haul towing I was looking to cut down on interior noise as much as possible. The reduction in road and engine noise was immediately noticeable on the first road test.
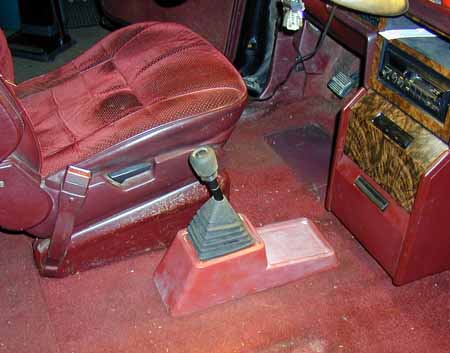
Carpet, console, shifter and sill plates reinstalled- The Shadow shifter has a bend in it which works perfect! Otherwise I'd have to reach forward to much.
The rest of the operation is pure service manual work except for three areas which will be noted below- Remove the automatic, remove the transmission cooler, swap over the speed sensor and speedometer gear to the manual trans, replace the flexplate with a flywheel using the correct bolts, install the clutch and then install the manual transmission. The 1987-1991 minivans axles will work fine, 1984-1986 owners will need to upgrade to the later model large spline axles. The factory manual mini's came with the equal length axles to reduce torque steer but I have not found that to be an issue.
Hook up the shifter & clutch cables and most of the hard work is complete!
Other issues;
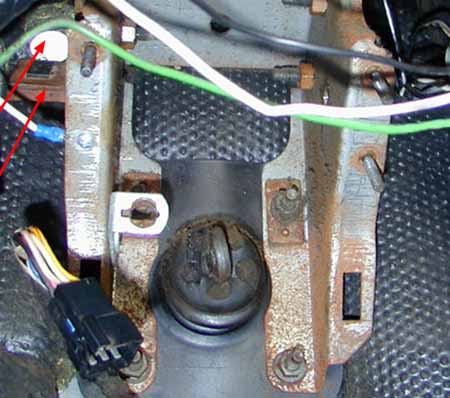
1) Reverse lamps and neutral safety switch.
If you look at the electrical plug on the front of the auto transaxle you will see three wires. The center wire is for the neutral safety switch and the van won't start unless this is grounded. Cut the wire off at the plug and run it to a clean ground with an eyelet. The last two wires are now for the backup lamp switch mounted at the top of the manual transaxle. Either obtain a manual reverse lamp plug and connect the wiring or use two crimp on female spade connectors if you are in a pinch.
2) Computer
You certainly can drive around with the factory auto computer but chances are you will run into two problems. The first is the van will tend to stall time to time on a decel when the clutch pedal is pushed in at low speeds. The manual computer is programmed to start raising the idle speed target when in a decel condition, the auto computers don't have this feature. The other problem is the cruise control will not function. Since you have the wiring grounded so the van starts the computer thinks you are in park all the time and the cruise is disabled! You can either cut the park indicator wire going to the computer at the SMEC connector or obtain the correct computer to fix both these problems. I will getting the correct 89 manual van calibration soon and will post it so you can get your computer recalibrated with the correct image.
3) Bobble strut on rear of transaxle.
Currently I don't have one connected and doesn't seem to be a problem but I don't tend to drive the van aggressively all the time. When I get a free moment I'll make up and weld in place the tabs needed to connect the other end of the strut to the k-member. I'm sure Chrysler had a reason for the bobble strut!
Reader notes-
Scott Monfort notes:
Don't know if you know about this or not, but 3M makes a weld through primer for bare metal. It's like a type of zinc coating you coat both sides of the metal with and then weld. Keeps anything from rusting later.
Ed Kelly has some '91 van notes:
1) The shaft the pedal assembly rides on is longer in the van pedals. (I will follow up on this)
2) I found that you can cut down the AT brake pedal "pad" to match the narrower MT width and put the MT rubber cover over it. After that it's a matter of bending the pedal over to clear the clutch pedal. A handy tip if you are unable to locate a van specific pedal assembly.
3) '91 and up don't have the holes in the firewall for the clutch cable but there is a dimple. The '91 van's also have dimples in the floor for the shifter cables. The carpet insulation is already precut like the 84-90 vans.
Ryan Lada notes:
I read your auto to 5spd conversion page on your site and was inspired to try it myself. I had a comment to add about the pedal assemblies. I thought I would the whole 5spd bracket from the donor vehicle. All that's really needed is the clutch pedal, brake pedal, clutch pedal stop, and the bolt that both pedals pivot on. It should save some time at the yard for people who aren't sure.
It seems that in 90 some of the auto
minivans got the large style engine mounts. This will pose a problem for anyone
converting a 90 minivan to 555. The trans mount will be too short to fill the
cavity in the body. The workaround is to take the stock 555 mount and grind off
the tab that holds the metal slide in, remove the 555 slide and install the
stock automatic metal slide. Note: Even a new mount for a 90 minivan ended up
being too short! Luckily the metal slide for both the small mount and the large
mount are the same diameter.