Ghostbusters Proton Pack (2011)
So about 30 days out from Halloween and I was at Target with the kids looking for costume ideas for them when I spied a Ghostbusters outfit on the rack. Frankly I thought it looked like ass, all platiciky complete with a goofy looking inflatable Proton Pack.. But I got to thinking...
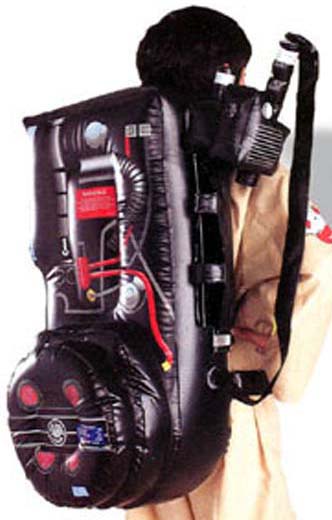
See? Might work as a flotation device.
Hell, all I need is a flight suit and pistol belt from the local Army-Navy store, a few patches, black gloves from Ebay and I can have a fairly nifty Halloween costume. And then I had another thought... why not go all the way and build a Proton Pack too? I had not planned too, but started looking around the 'net for ideas... and its all down hill from there!
Lets get something out of the way first- I'm not a huge fan of the Ghostbusters movie, might have seen the movie twice in my life but I'm fascinated now with the whole concept of prop building.. and of course I picked one of the most complex props to build. Figures right?
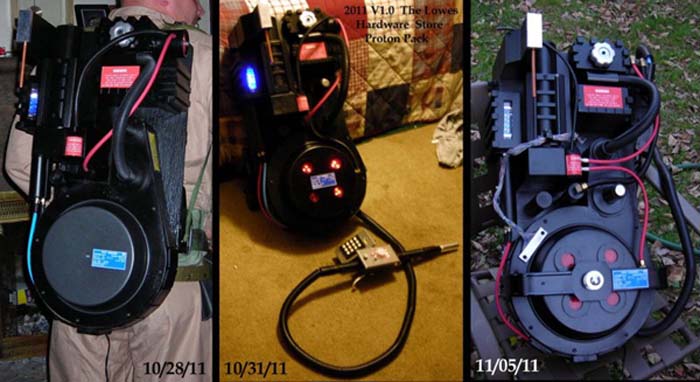
So from left to right I'll show you where I ended up. Working like crazy for 30 days I ended up at our facility trick or treat event with the pack on the far left. Clearly the pack wasn't finished by a long shot missing some key details and only had a flashing blue $6 light for the "powercell." The pack was largely constructed with wood from Lowes and 1/8" birch plywood from a local hobby store, ABS piping and other items scavenged from here and there. By the 31st I had managed to add the red circulating lights ($17) and sound via a battery powered set of PC speakers and a MP3 player, and come up with a half-assed wand so I could go out with the kids trick or treating. On the 5th, I spent some time doing some detail work like installing the rest of the cables and making a bumper.
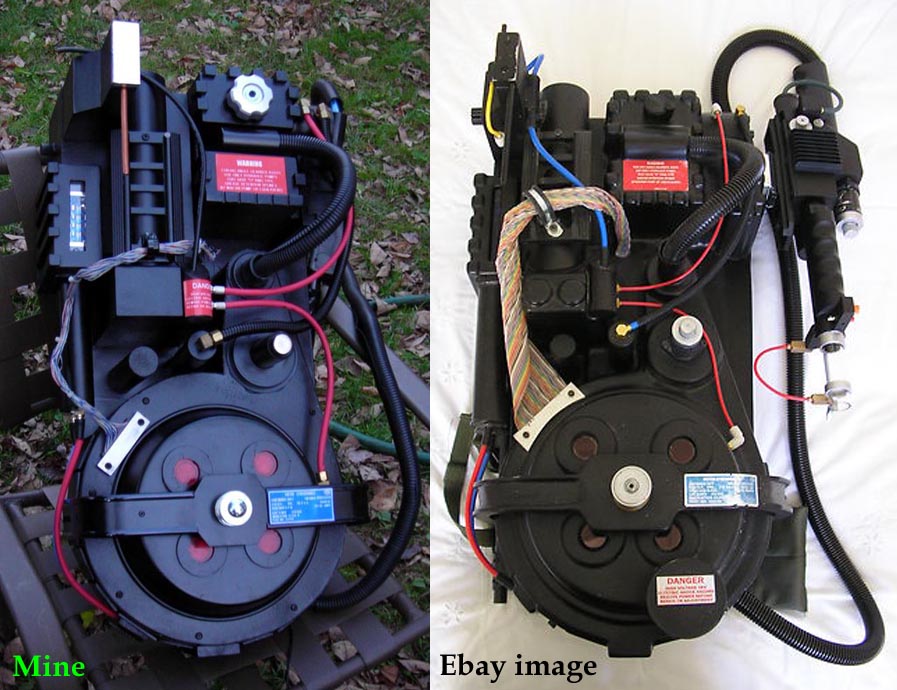
Not terrible but compared to the vacuum formed reproduction shell on the right.. I could do better.... To give you a frame of reference, below is two shots of the screen used packs.
This shot was from the first movie when the pack was clearly fresh out of the studio prop dept- Notice the lack of weathering, clean paint, gray crank knob and odd ribbon cable with clear sections. The tip of the wand looks strange because the screen "hero" packs had a flashbulb in the tip that would go off during filming and would let the effects team know where to start the stream effect and when to begin.
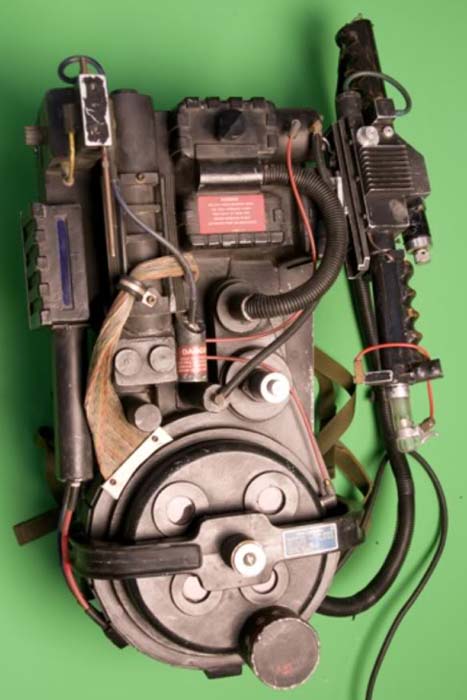
This picture is from Sony Studios used in the sequel- Notice the heavy weathering and beat up appearance, black crank knob and different ribbon cable.
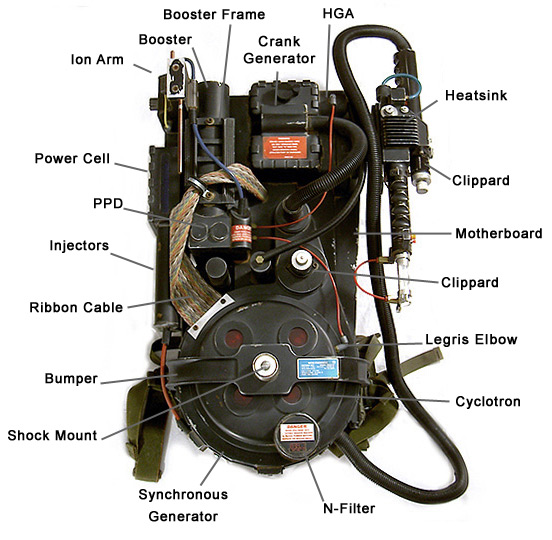
Some nomenclature if you are confused about some of the terms utilized in this article.
Movie trivia- There were actually two or three different versions of the Proton Pack used in the movies.
Version #1 would be the "hero" pack. When it comes to props, a "hero" prop is always the best or has some sort of unique function that stands it out from the rest. As far as I know, in the first movie all the packs were hero packs aside from the stunt units.
Version #2 would be the stunt pack. Made of foam rubber this would be used in a scene where the actor could be hurt by a real pack if he fell or damage a set. In the first movie when Bill Murray is slimed for the first time and lying on his back in the hallway, notice how flat he is against the floor. He is wearing a foam rubber stunt pack as this would be impossible with a real one. The stunt packs had only rudimentary lighting that just flashed or in some cases none at all.
Version #3 would be the "semi-hero" pack used in the Ghostbusters II movie. It was used for most of the shots that were not close up nor required a stunt. Seems some of the actors complained (rumor Bill Murray) that the packs were too heavy and they wanted something lighter. So the studio took a hero pack and replaced most of the metal bits with plastic or resin pieces to make it lighter.
As far as anyone knows, the screen used packs were made from fiberglass shells with details added on. When it comes to prop reproductions packs fall into four categories.
Junk or hardware store packs- Usually take existing pieces like electrical, makeup or pencil boxes and loosely resembles a proton pack.
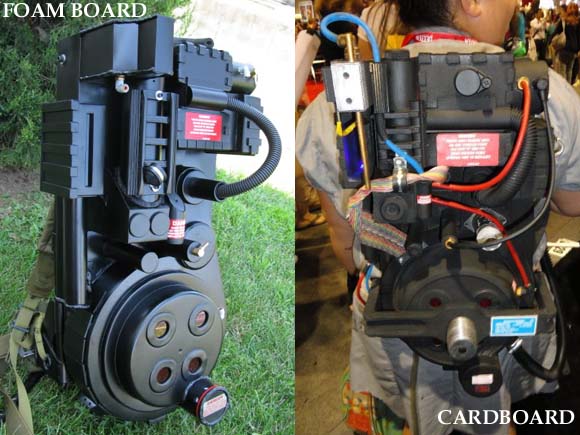
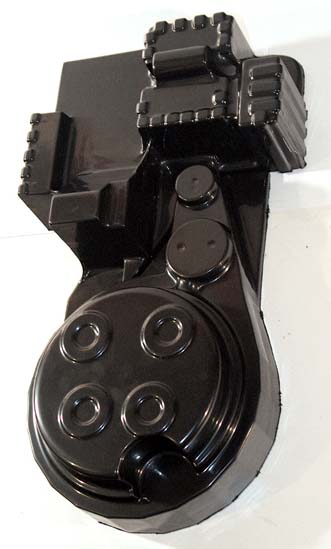
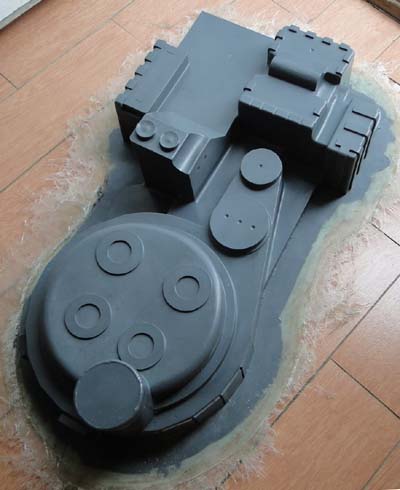
Scratch built- As the name implies, made from scratch using plywood, cardboard, foam board, ABS plastic or MDF wood product. In my opinion these can be the best packs if proper care is taken.
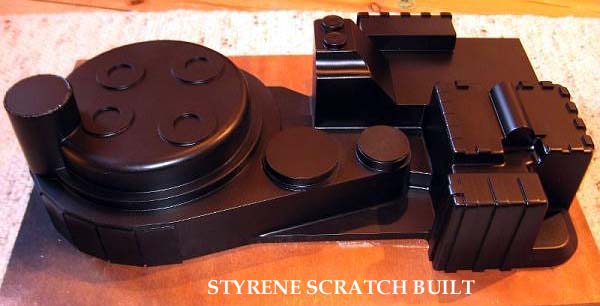
Quality of scratch built will range from "eww thats gross" to HOLY SMOKES depending on the skill set and determination of the builder.
Vacuum shell- Made from ABS plastic that is heated and drawn over a wood form via a vacuum table. Very light but usually lack good detail and sharp edges.
4) Fiberglass- Just like the movie packs, made from a mold. Quality will very from seller to seller based on their skill with fiberglass and how well they made the master for the mold.
This section will show some of the details as I rework my pack into something better.
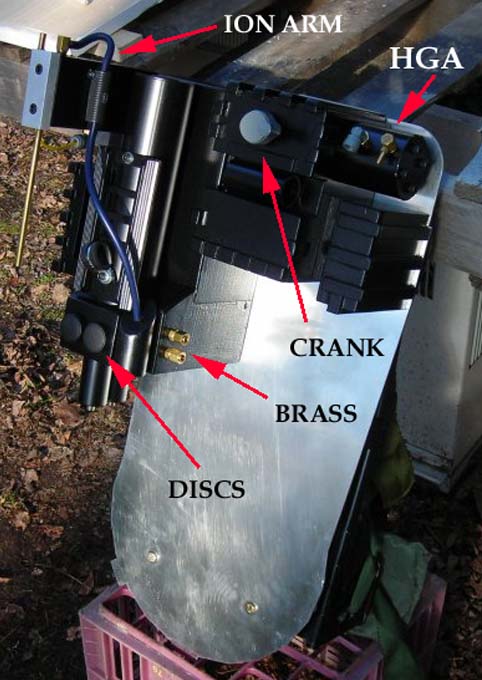
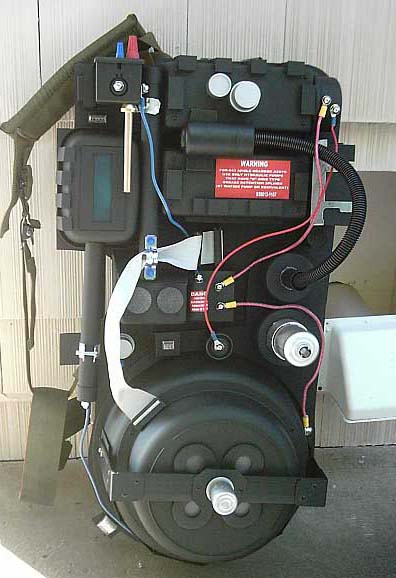
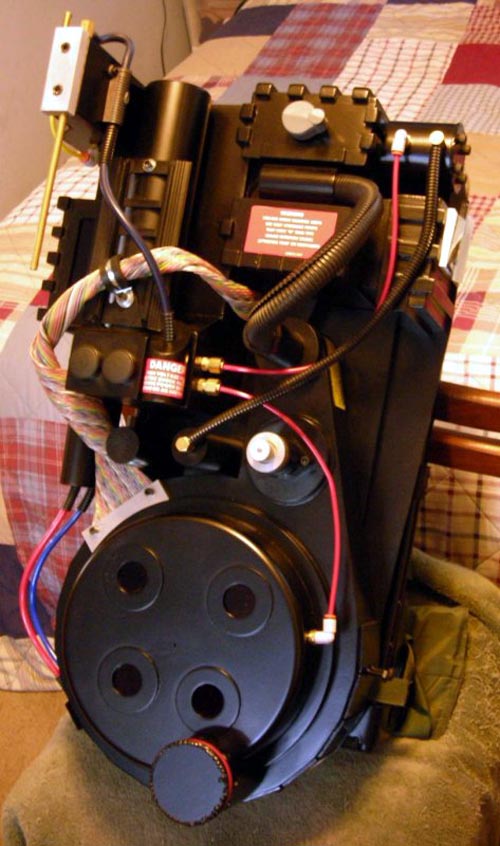
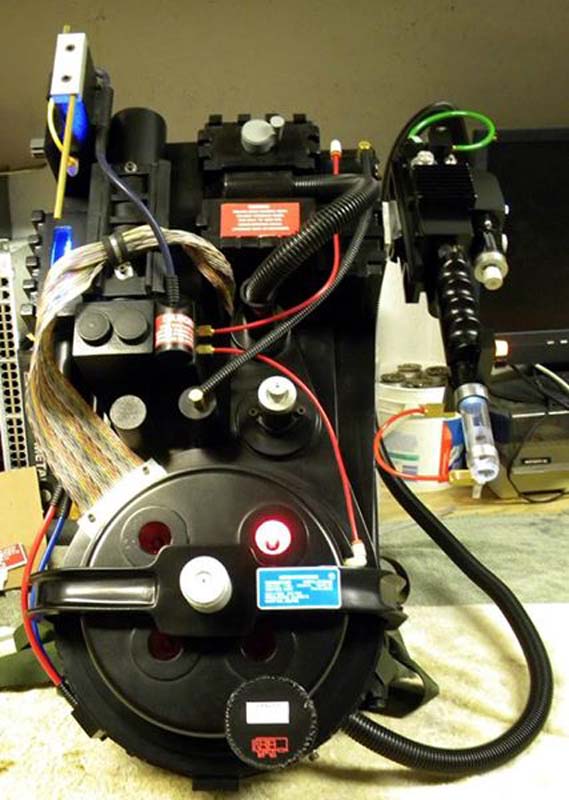
Ok- Note the wood motherboard has been replaced with an aluminum unit like the movie packs. The two missing discs were added to the booster tube area, the shower chair knob was replaced with the correct crank, the HGA was redone with the correct cap screws. The ION arm has the correct aluminum cap on the end with a brass rod and has the appropriate resistors and hoses. The major pieces themselves were refinished and reworked to more accurate reflect to movies packs including correct fasteners. Note how rounded the trim pieces are now on the crank box and the even spacing of the ribs of the powercell.
Everything on my pack is designed to be as modular as possible so an individual piece can be swapped out if need be due to damage or upgrades.
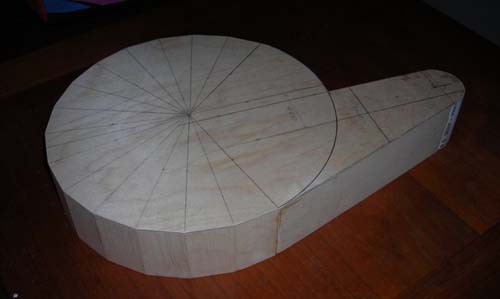
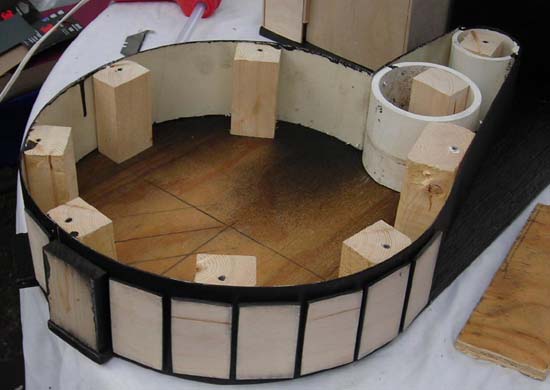
Here you can see I have started on my spacer for the lower section. 1/8" birch plywood from A.C. Moore.
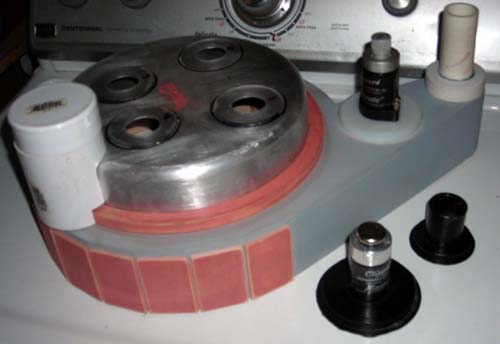
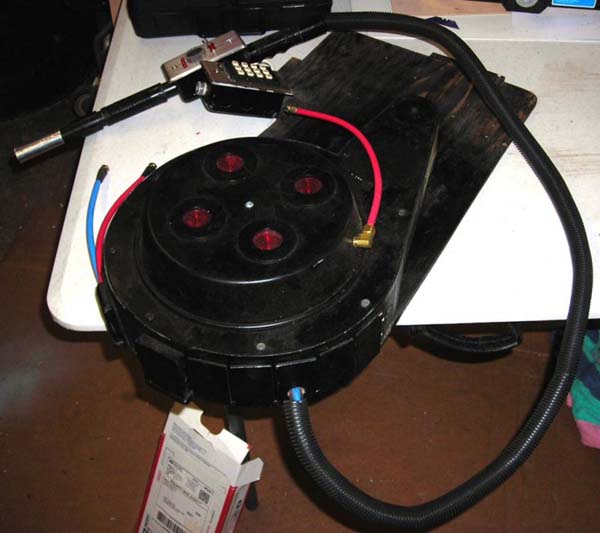
What it looks like after I fabricated the cosmetic plates and spacer around the cyclotron, made the spacer for the Clippard valve and crank box hose connection and started on the N-Filter. The cyclotron itself is a 9 inch cake pan from Wal-Mart that had the correct radius with the washers made from plexiglass.
After painting and other detail work. I have obtained a bumper and the "shock" is in route.
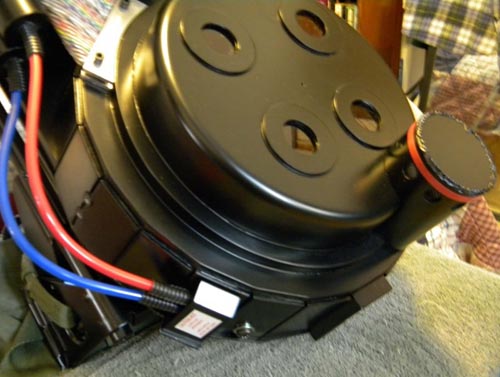
Here you can see its looking more like a screen pack all the time!

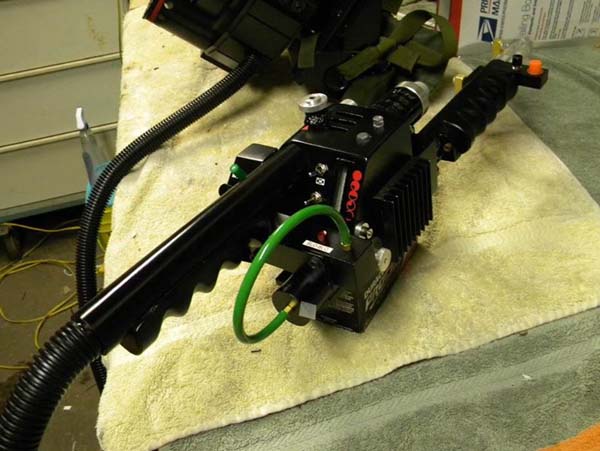
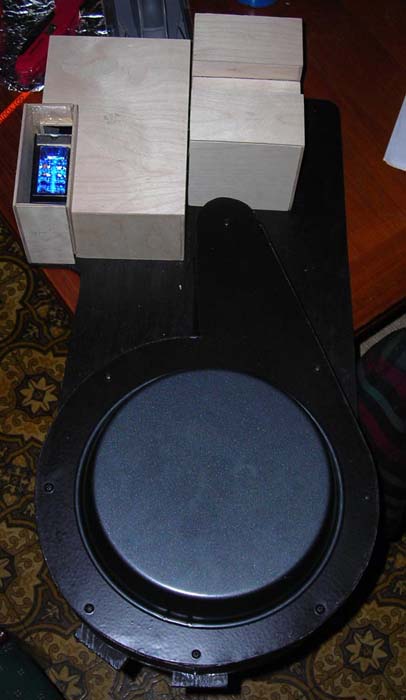
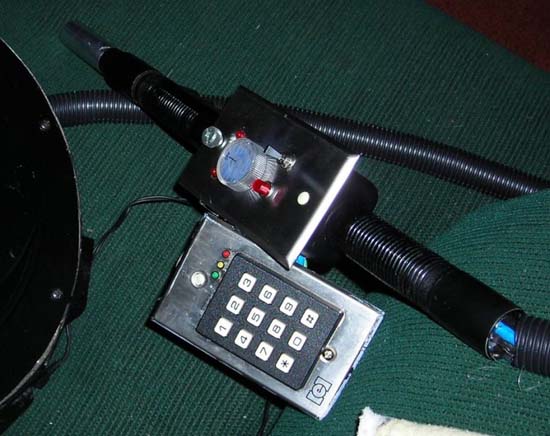
Side view showing some details. Where I last left off- I need to mount the electronics, add the bumper and shock and start assembling the proton gun kit.
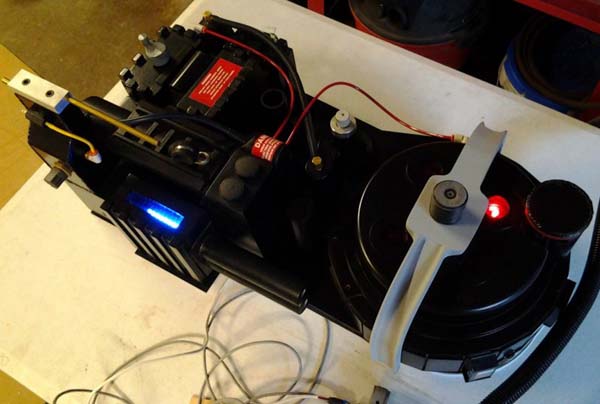
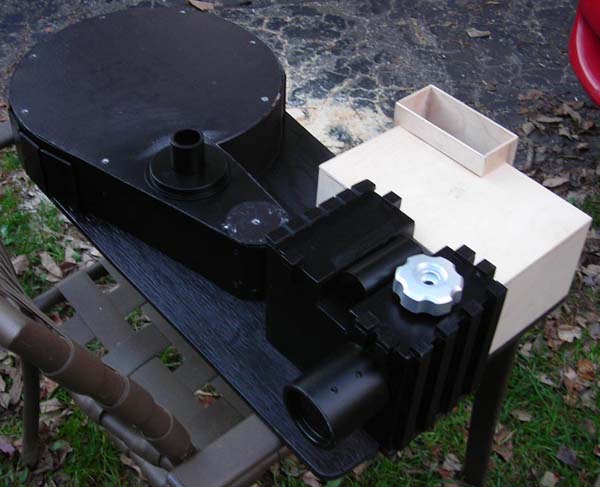
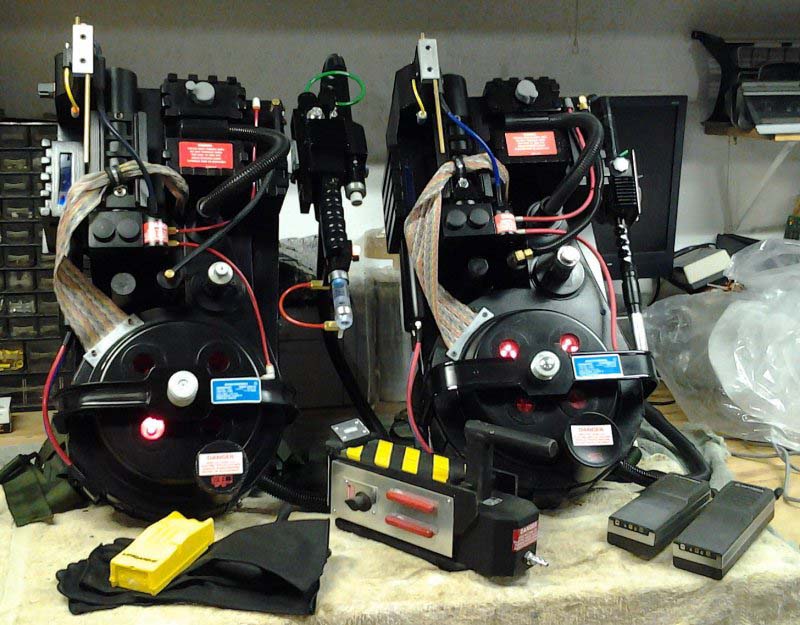
2013- Electronics installed and test fitting the bumper.
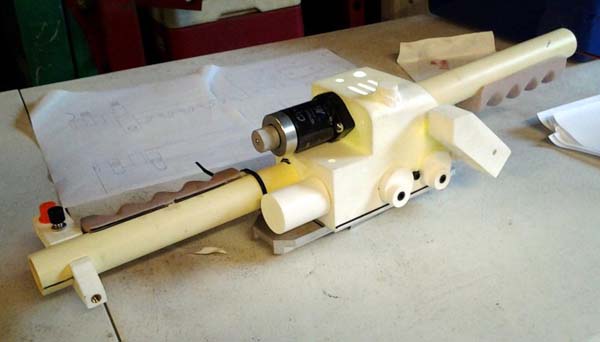
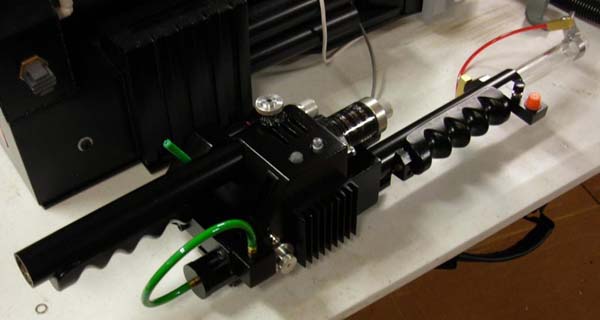
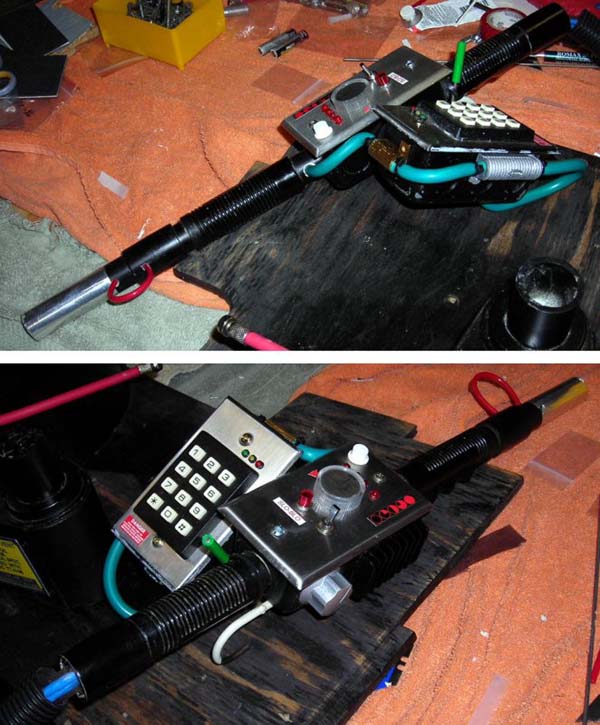
I started construction on the wand which is a resin kit.
The kit itself comes with all you need but I ended up replacing some items with the real things.
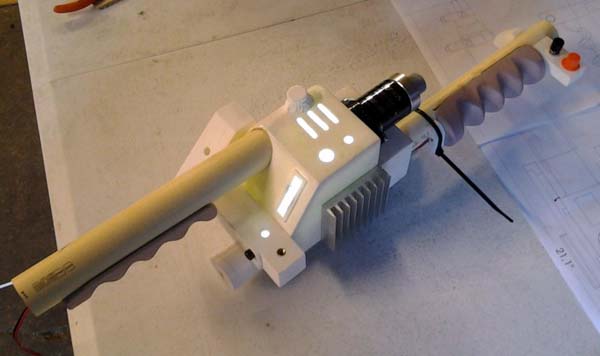
Almost done.
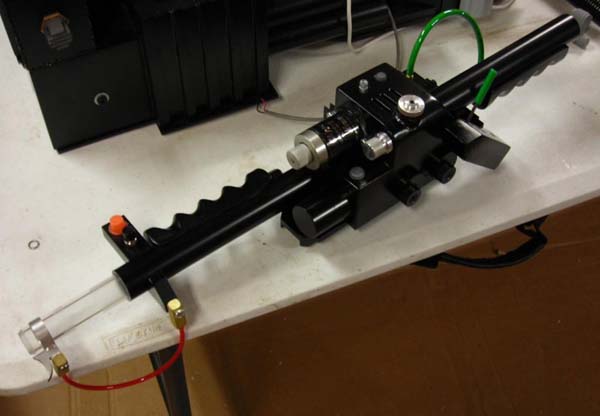
Here you can see some of the real aluminum components- The valve, brass bits, knobs, etc.
All assembled and wired up.
Complete! Some details are not 100% like the depths of the ribbing but can be addressed in the future.
Video showing off pack functions.
Some build pictures of the original 2011 pack.
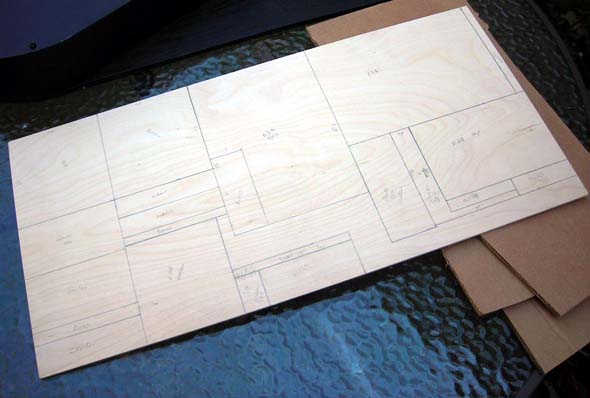
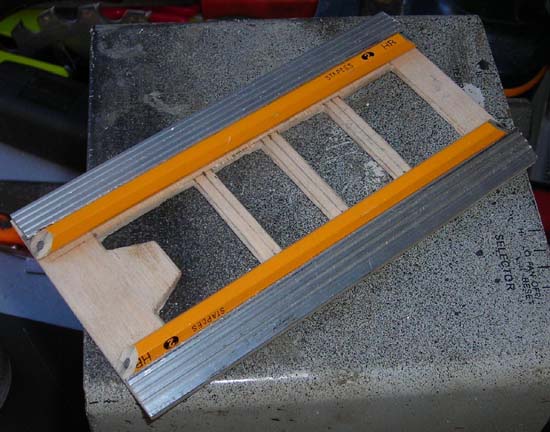
Here you can see where I drew out all the boxes on birch sheets before cutting.
The spacer was made up of scrap plastic wall protection and wood.
Test fitting the boxes to the plywood motherboard. You can see in this shot I have the spacer clocked to far to the left.
Here you can see the gearbox has been just completed and the spacer is in the correct location.
The booster frame I was very proud of, it came out very nice when finished.
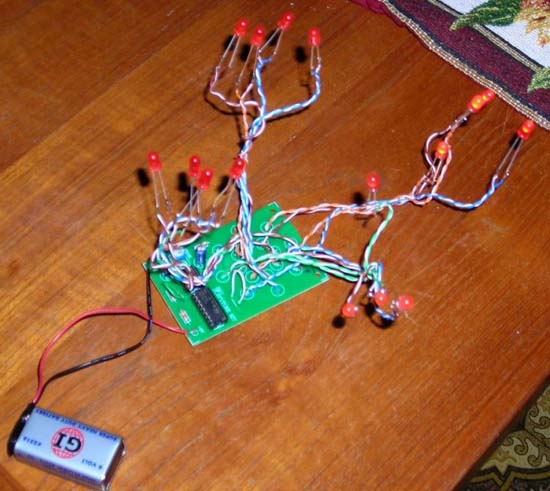
Speed adjustable chaser lights- I extended the leads with network cable.
The wand done in an hour, I ran out of time plain and simple.
2011 pack revisited
So my son thought in 2013 it would be cool to be a Ghostbuster as well for Halloween so I got cracking. This is what I had to start with, the remains of the 2011 pack.

Here you can see where I have built new sections for the missing areas.
I didn't have time to build a new wand so sexed up the old one with GB decals, hoses and odds and ends.
And the final results, not too shabby! It just has lights, no sound effects at this time.
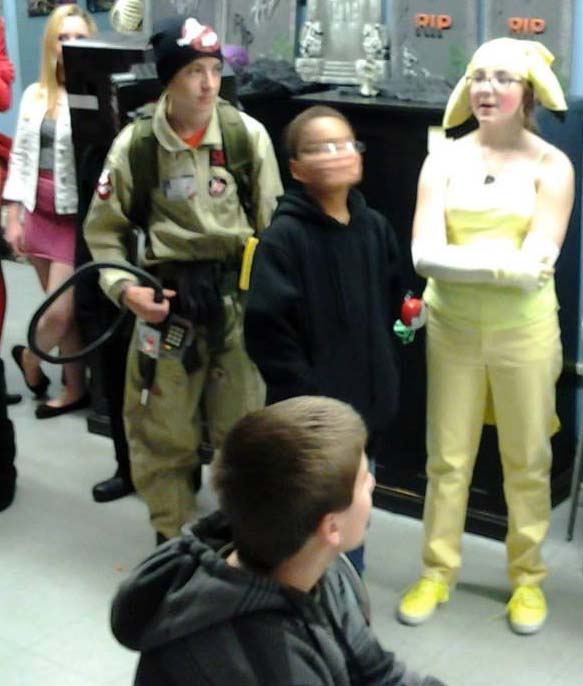

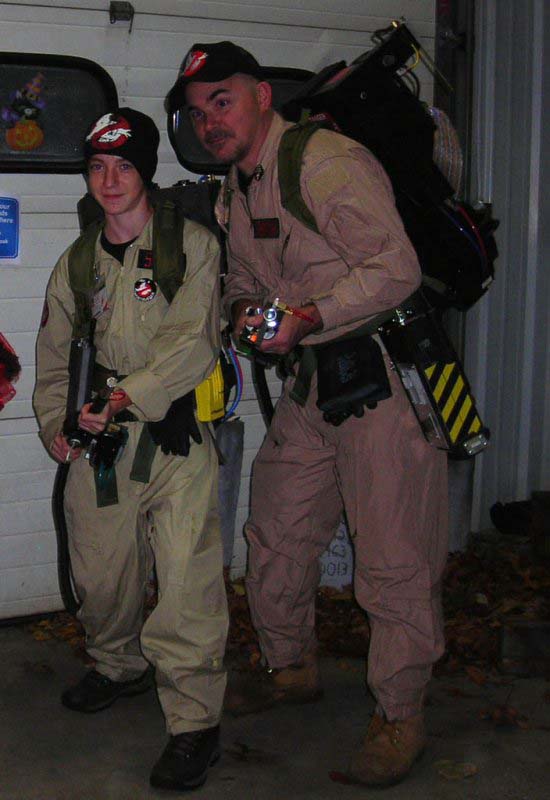
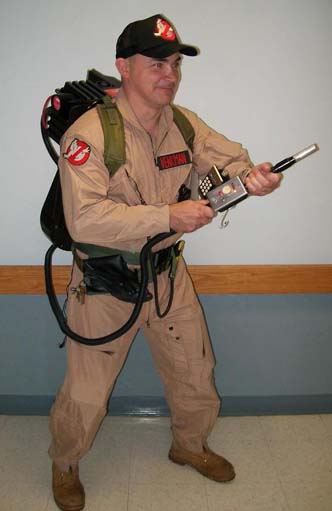
Some pictures of Kyle and I at a local car dealer costume party.
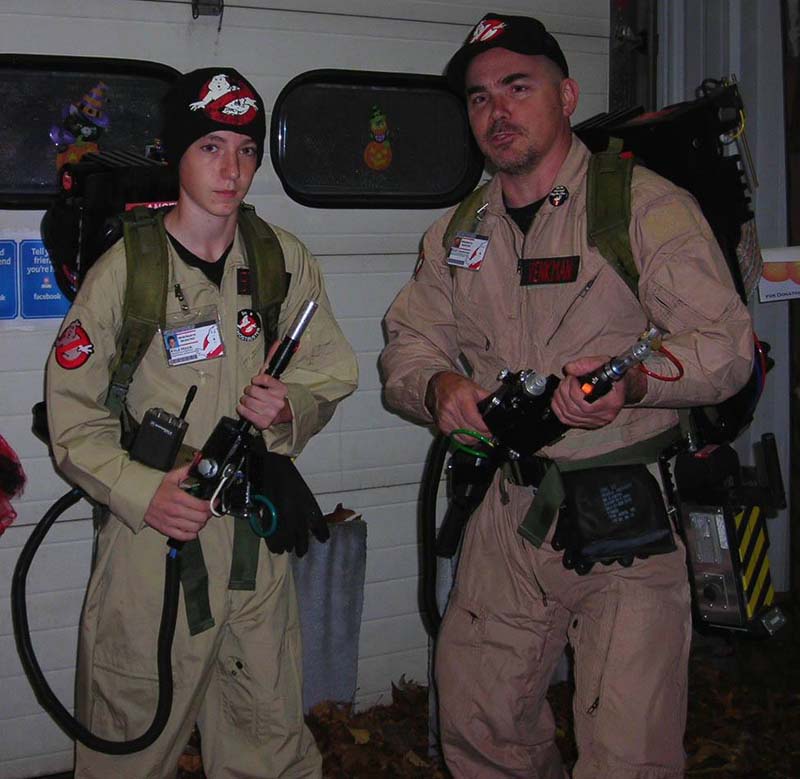
We took first place in our classes!
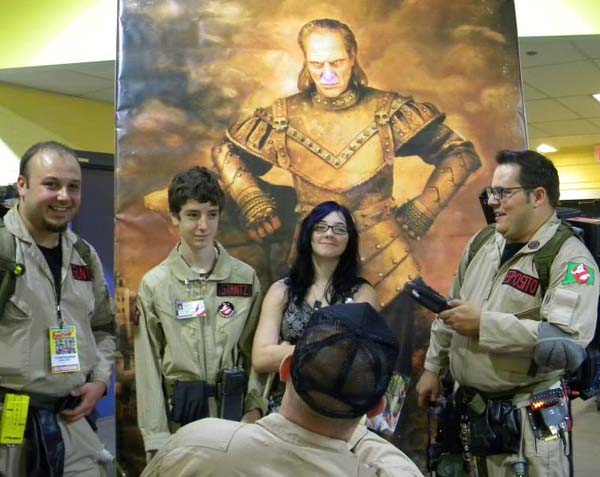
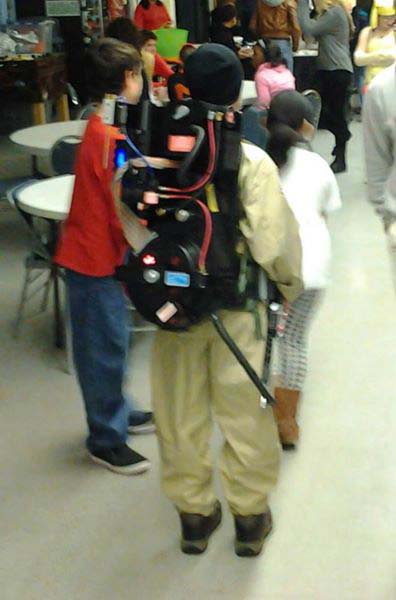
The kids have fun at a local Comic Con.
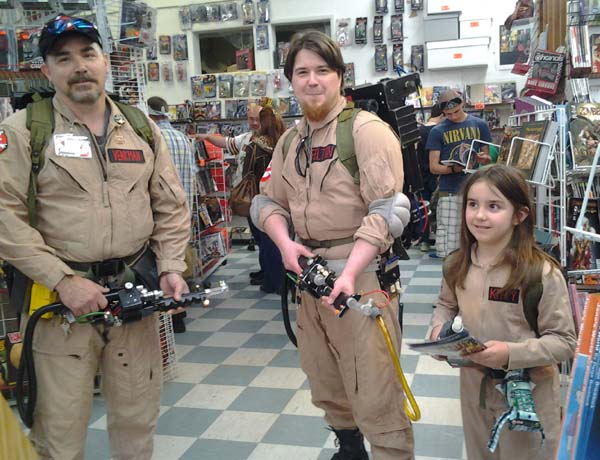
Ghostbusters bump into each other at local free comic day at Sarges Comix.