Gary's Talon BOV Hi-boost
Modification page
90-93 Talon Blow Off Valves are an excellent part for the money: They are cheap new ($86), EVEN cheaper used from a junkyard ($5-$20) and are very durable. They have only one weakness however and that's at boost levels over 17 psi the valve starts to leak pressure to atmosphere and you loose power!
I'm going to show you how to fix that!
Tools & parts you will need:
10-24 standard tap
6 mm tap and die
1/8 & 9/64 drill bit and drill
brake line cutting tool
short piece of 3/16 steel brake line
JB weld epoxy
10-24 x 3/16 set screw (I got mine from Home Depot)
Allen key for set-screw
Brake cleaner
WD-40
PLEASE READ ALL THE STEPS BEFORE DOING ANY WORK SO YOU HAVE A CLEAR UNDERSTANDING WHAT'S GOING ON AND WHY.
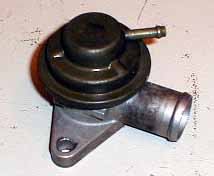
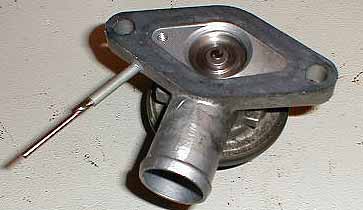
Step #1 is drilling an external boost reference port.
The idea here is to drill a hole
using the 9/64 drill-bit on a slight angle so there is room in the base
of the BOV for the 3/16 long set-screw we will be installing later. The
idea is to intersect the port going from the flange to the lower part of
the diaphragm. After you drill the hole its a good idea to use a
vacuum cleaner to ensure there are no chips of metal in the diaphragm port.
For Step #2 you are going to tap the hole with the 6 mm tap. It's a good idea to do this with the port facing down so chips do not fall into the diaphragm and use the WD-40 to lube the tap to prevent it from galling the metal. After you done clean the area (and the tap) with the brake clean so no traces of oil remain.
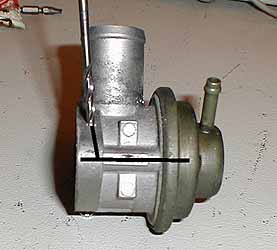
Since we are taping holes, break out the 10-24 tap and run it in the port opening at the base of the flange.
ONE OR TWO TURNS IS ALL YOU NEED!!! I didn't even bother to lube the tap for this step, the 10-24 x 3/16 set-screw is such a perfect fit for this it almost self taps it's way in except for a little bit, this is why it's important to tap out JUST one or two threads. No more! Again be careful about chips and clean up when your done.

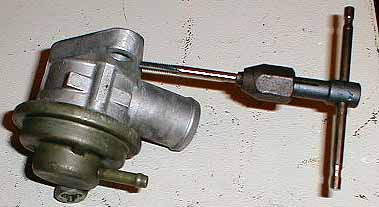
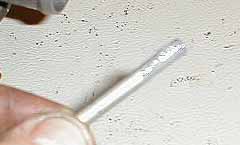
Step #3: take the 3/16 steel brake line and run the 6 mm die down it about a 1/2 inch, it won't make very deep cuts and that's expected. Remove the die and set aside.
At this point use the tube cutting
tool and trim the piece you just threaded so it's about an inch and a quarter
long (you will be able to shorten it later if you wish, its easy to do.)
It's MUCH harder to stretch steel so it's best to start off a little on
the long side.
Step #4: Bust out the JB Weld and mix up a small batch, and apply some to the end of the threaded section of brake line. I also like to take a paper clip and coat a little on the threads that were tapped into the flange as well. What are you waiting for? Screw'er in! Make sure the end of the line (or any JB Weld) DOES NOT intrude into the port going into the diaphragm. It may be loose going in due to the shallow line threads, after the epoxy sets it won't be loose anymore!
After you are done screwing
the line in place take the 1/8 drill bit and use it to clean any JB Weld
that may have entered the line. You can use a paper clip or a toothpick
to clean any epoxy that has entered the port at the base of the flange.
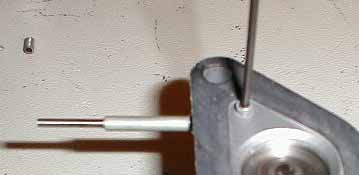
Step #5: Clean the 1/8 drill bit and insert it back into your new port. MAKE SURE IT COMES OUT THE LINE AND HITS THE FAR SIDE OF THE PASSAGE! This is what we are going to use to determine how far to screw in the set-screw. Dab a little epoxy on the set-screw and run it in till its flush with the flange OR it hits the drill bit. If it hits the drill bit and isn't quite flush with the flange don't fret. Just remove the drill bit and let the epoxy dry overnight then just grind off the excess with a benchgrinder, cut-off wheel or dermal tool.
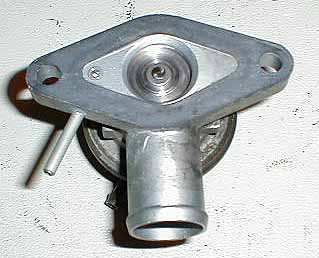
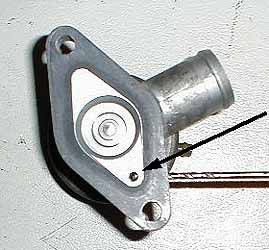
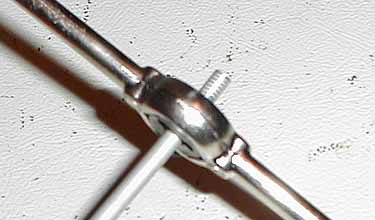
If you did your job correctly this is how the valve should look like- now pressure from the upper intercooler line cannot reach the lower port in the BOV. Installed on the Daytona with the new port open to atmospheric pressure this valve has held without leaking at 30 psi! And the best part is if I want the BOV to be "quick releasing" again (that's the whole point of having that port in the base of the valve from the factory) its a simple matter of running a vacuum line from the turbochargers outlet nipple to the new port and viola'.
Gus Mahon has a nifty diagram
on his page showing
how you can add a electric solenoid so you can go from quick release to
the no leak action at the flip of a switch! (I'm lazy and haven't
gotten around to it yet)
A quick tip because this has
come up already: The upper part of the B.O.V. MUST AT ALL TIMES be connected
to a vacuum/boost source behind the throttle body that has full engine
vacuum when the engine is at idle. The new port you just added MUST
be hooked to the turbo's outlet barb or somewhere in the intercooling tubing
for the BOV to work correctly in fast release mode. Or you could
just leave the port open to outside air but you loose the fast release
feature which is fun for scaring the hell out of honda drivers ;-)
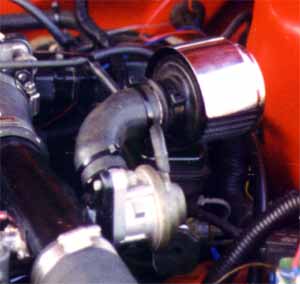
Pre-modified BOV installed
on my Daytona...
A Question from a reader!
Michael asked:
Now for the question, I am looking at the BOV stuff and notice that you have some sort of chrome muffler/aircleaner thing attached to the BOV exhaust hose, what is that thing?
Its a Moroso valve cover breather PN# 68811 with a K&N style element.
And is it necessary?
Sure is! When under cruise or at idle the BOV is open to outside air! So some of the engines air gets pulled through the BOV opening. Without a filter a lot of dirt and debris would get ingested into the engine under these conditions.